Customizable Order Tracking Pages and Links
Watch an interactive demo of how to customize order tracking pages and email and SMS delivery notifications.
Keep your customers informed every step of the way with customizable order tracking pages. Add your store logo, change the background colour, and edit the text to create the tracking page that best compliments your business and the delivery experience you want to offer your customers.
Want to learn more about how to send delivery updates to your customers? Read more about delivery notifications.

How to Edit Order Tracking Pages
To edit your Tracking Pages, click on the "Settings" tab from the EasyRoutes app navigation and select the "Order Tracking" tab.
How to Display Real-Time Driver Location
In order to display real-time driver location in your customer tracking pages, it must first be enabled in your EasyRoutes Settings - see the Real-Time Location Tracking support article for details on enabling and configuring this feature.
Once enabled, customer tracking pages can be configured to display a delivery driver's real-time location when a customer's stop is anywhere from 1 stop to 10 stops away, as shown below with an orange vehicle pin. Tracking pages will also contain a line below the map indicating how recently the driver's real-time location was updated:

- From the EasyRoutes Settings menu, click the "Order tracking" tab.
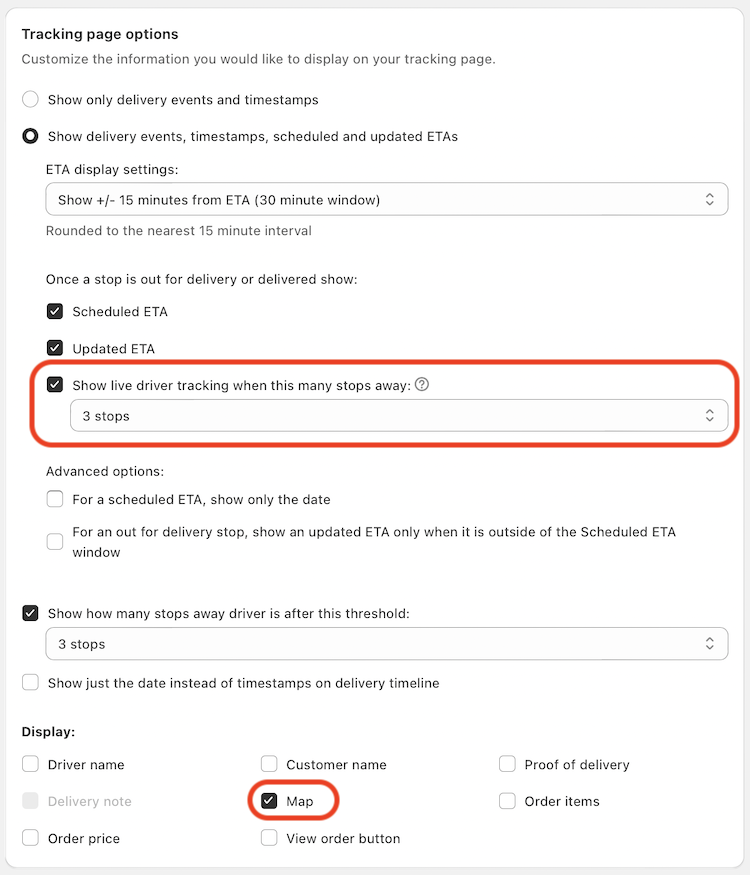
- Scroll down to the "Tracking page options" section.
- Check the box for "Show live driver tracking when this many stops away".
- Use the dropdown menu below to configure when a driver's live location will be displayed (from 1 stop away to 10 stops away from a customer).
- Ensure the "Map" checkbox is also checked under the "Display" section:
How to Preview Your Order Tracking Pages
You can preview your customer tracking page by clicking the Preview button in the Preview Tracking Page section at the top of the page. You can select which order status you would like to preview in the drop-down selector (Out for Delivery, Delivered, etc.). The preview will appear in a pop-up modal:

Close it to return back to editing.
Saving Your Changes
When you are happy with your Tracking Page, click the Save button at the top of the screen to apply your changes.
Email Templates
The tracking link will be inserted automatically in your default email template, however if you have heavily modified this template before, you may need to manually insert the link using the following code snippet:
{% if fulfillment.tracking_numbers.size > 0 %}<br> <p><br> <br/><br> {% if fulfillment.tracking_numbers.size == 1 and fulfillment.tracking_company and fulfillment.tracking_url %}<br> {{ fulfillment.tracking_company }} tracking number: <a href="{{ fulfillment.tracking_url }}">{{ fulfillment.tracking_numbers.first }}</a><br> {% elsif fulfillment.tracking_numbers.size == 1 %}<br> Tracking number: {{ fulfillment.tracking_numbers.first }}<br> {% else %}<br> Tracking numbers:<br /><br> {% for tracking_number in fulfillment.tracking_numbers %}<br> {{ tracking_number }}<br /><br> {% endfor %}<br> {% endif %}<br> </p><br>{% endif %}